Introduction to HTML Image Padding
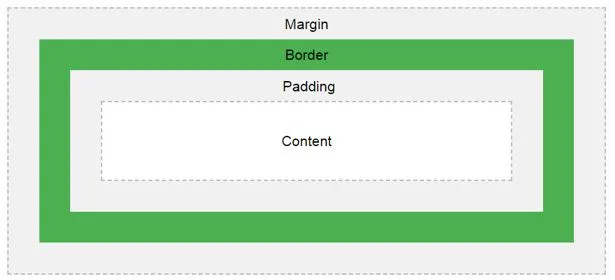
The padding property in html gives space around the innermost element’s content of the box-like structure. The margin property in html gives space around the outermost element’s content of the box-like structure. The space around padding and margin is called a border.
The difference between the padding, margin, and border you can observe below:
- As we know common styles in all the pages, we always preferred CSS over HTML.
- All common properties are implemented in CSS only.
How does Image Padding Work in HTML or CSS?
- Padding is always created space between innermost portions, whether it is image or content.
- Padding with image defines by img tag in CSS only.
Syntax 1:
img
{
Padding: 10px,10px,10px,10px; //padding positions
}
Syntax 1 Explanation:
If we apply padding with 4 values, then the first value is for the top, the second value is for the right, the third value is for the bottom, and the fourth value is for the left applied, respectively.
Syntax 2:
img
{
Padding: 10px,10px,10px; //padding positions
}
Syntax Explanation:
If we apply padding with 3 values, then the first value is for top, the second value is for left and right, the third value is for bottom applied, respectively.
Syntax 3:
img
{
Padding: 10px,10px; //padding positions
}
Syntax Explanation:
If we apply padding with 2 values, then the first value is for the top and bottom, and the second value is for the left and right applied, respectively.
Syntax 4:
img
{
Padding: 10px; //padding positions
}
Syntax Explanation:
If we apply padding with only single values, then applied it for all four sides equally. Popular Course in this categoryHTML Training (12 Courses, 19+ Projects, 4 Quizzes)12 Online Courses | 19 Hands-on Projects | 89+ Hours | Verifiable Certificate of Completion | Lifetime Access | | 4 Quizzes with Solutions
4.5 (6,502 ratings)Course Price
₹6999 ₹41999
View Course
Related CoursesBootstrap Training (2 Courses, 6+ Projects)XML Training (5 Courses, 6+ Projects)CSS Training (9 Courses, 9+ Projects)
Examples of HTML Image Padding
Given below are the examples of HTML Image Padding:
Example #1 – Image Padding with 4 Padding Values
HTML Code:
<!DOCTYPE html>
<html>
<head>
<title>Image Padding</title>
<link rel="stylesheet" href="ImagePaddingFourSides.css"></link>
</head>
<body>
<font color="green">
<h2>Image without Padding</h2>
</font>
<p>
<img src="Tulips.jpg" class="noPadding">
</p>
<font color="green">
<h2>Image with Padding</h2>
</font>
<p>
<img src="Tulips.jpg" class="padding">
</p>
</body>
</html>
CSS Code:
.noPadding
{
width:400px;
height:400px;
border: 5px solid brown;
}
.padding
{
width:400px;
height:400px;
padding: 50px 50px 50px 50px;
}
Output:
Output before applying padding:
Output after applying padding:
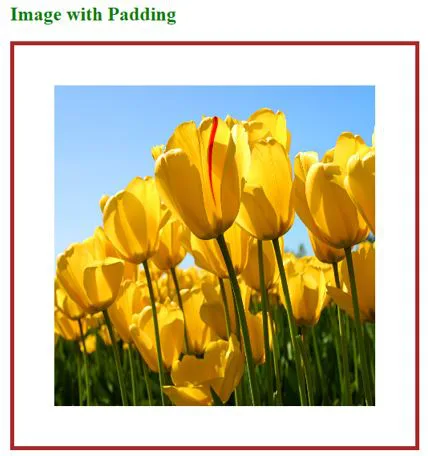
Explanation:
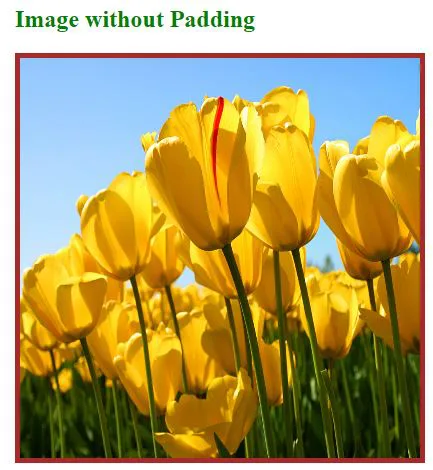
- The first image class name, noPadding and second image class name padding have taken in HTML code in the above code.
- In CSS code, noPadding class has without padding with 5px border. No padding does not give any space around the image. It strictly sticks to the border. You can see it in the above 1st image.
- Padding class has with padding 50px and 50px border. Due to this padding around the image, we have seen some space from the border. You can see it in the 2nd image.
Example #2 – Image Padding with 3 Padding Values
HTML Code:
<!DOCTYPE html>
<html>
<head>
<title>Image Padding</title>
<link rel="stylesheet" href="ImagePaddingThreeSides.css"></link>
</head>
<body>
<font color="green">
<h2>Image without Padding</h2>
</font>
<p>
<img src="Koala.jpg" class="noPadding">
</p>
<font color="green">
<h2>Image with Padding</h2>
</font>
<p>
<img src="Tulips.jpg" class="padding">
</p>
</body>
</html>
CSS Code:
.noPadding
{
width:400px;
height:400px;
border: 5px solid yellow;
}
.padding
{
width:400px;
height:400px;
padding: 50px 20px 50px;
border: 5px solid yellow;
}
Output:
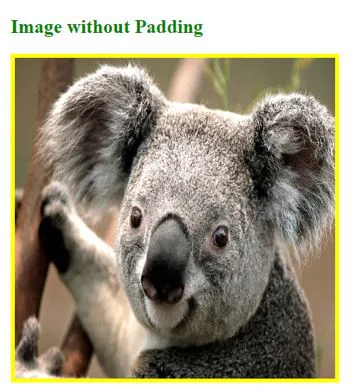
Output before applying padding:
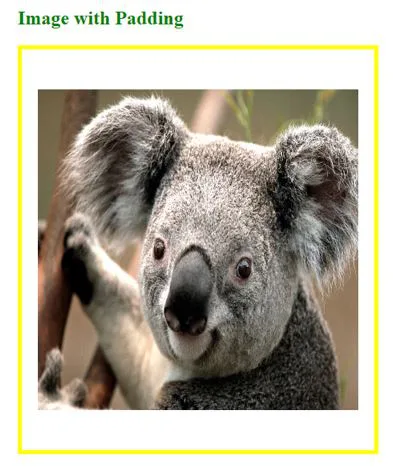
Output after applying padding:
Explanation:
- In the above code first image class name, noPadding, and second image class name padding have taken in HTML code.
- In CSS code, noPadding class has without padding with 5px border. No padding does not give any space around the image. It strictly sticks to the border. You can see it in the above 1st image.
- Padding class has with padding 50px 20px 50px and 5px border. Due to this padding around the image top 50px, left and right 20px and 50px bottom respectively. We have seen some space from the border. You can see in the 2nd image.
Example #3 – Image Padding with 3 Padding Values
HTML Code:
<!DOCTYPE html>
<html>
<head>
<title>Image Padding</title>
<link rel="stylesheet" href="ImagePaddingTwoSides.css"></link>
</head>
<body>
<font color="green">
<h2>Image without Padding</h2>
</font>
<p>
<img src="Desert.jpg" class="noPadding">
</p>
<font color="green">
<h2>Image with Padding</h2>
</font>
<p>
<img src="Desert.jpg" class="padding">
</p>
</body>
</html>
CSS Code:
.noPadding
{
width:400px;
height:400px;
border: 5px solid yellow;
}
.padding
{
width:400px;
height:400px;
padding: 75px 50px;
border: 5px solid yellow;
}
Output:
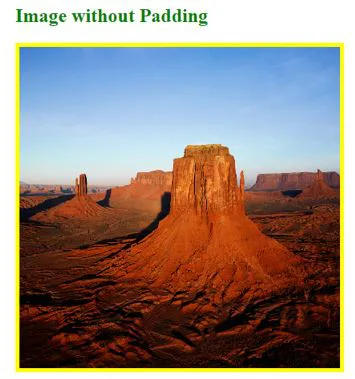
Output before applying padding:
Output after applying padding:
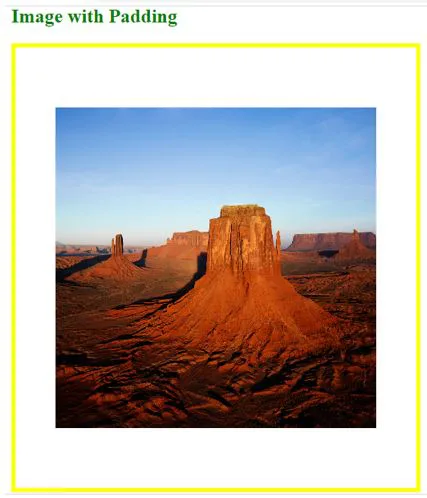
Explanation:
- The first image class name, noPadding and second image class name padding have taken in HTML code in the above code.
- In CSS code, noPadding class has without padding with 5px border. No padding does not give any space around the image. It strictly sticks to the border. You can see it in the above 1st image.
- Padding class has with padding 75px 50px and 5px border. Due to this padding around the image top and bottom 50px and left and right 50px, respectively. We have seen some space from the border. You can see it in the 2nd image.
Example #4 – Image Padding with a Single Padding Value
HTML Code:
<!DOCTYPE html>
<html>
<head>
<title>Image Padding</title>
<link rel="stylesheet" href="ImagePaddingSingleSides.css"></link>
</head>
<body>
<font color="green">
<h2>Image without Padding</h2>
</font>
<p>
<img src="Penguins.jpg" class="noPadding">
</p>
<font color="green">
<h2>Image with Padding</h2>
</font>
<p>
<img src="Penguins.jpg" class="padding">
</p>
</body>
</html>
CSS Code:
.noPadding
{
width:400px;
height:400px;
border: 5px solid blue;
}
.padding
{
width:400px;
height:400px;
padding: 70px;
border: 5px solid blue;
}
Output:
Output before applying padding:

Output after applying padding:
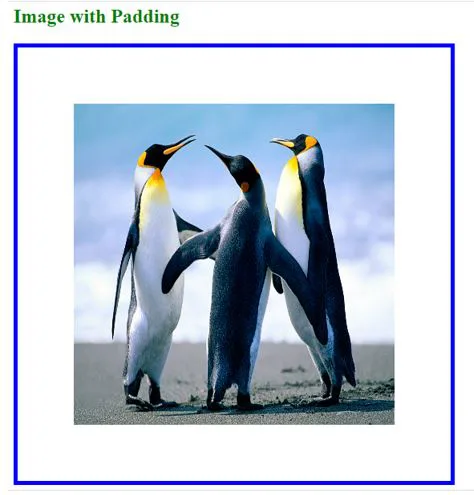
Explanation:
- The first image class name, noPadding and second image class name padding have taken in HTML code in the above code.
- In CSS code, noPadding class has without padding with 5px border. No padding does not give any space around the image. It strictly sticks to the border. You can see it in the above 1st image.
- Padding class has with padding 70 and 5px border. Due to this, padding around the image top, left, right and bottom 70px around respectively. We have seen some space from the border. You can see it in the 2nd image.
If we want to apply only particular side padding, then CSS provides predefined properties:
- Padding-left: 10px: apply padding 10px to left side.
- Padding-right: 10px: apply padding 10px to right side.
- Padding-top: 10px: apply padding 10px to top side.
- Padding-bottom: 10px: apply padding 10px bottom side.
Note: To include css file in html use <link rel=”stylesheet” href=”ImagePaddingSingleSides.css”></link> tag.
Conclusion
Image padding gives space around the innermost portion. We can apply with one, two, three and four values with padding inside the img tag.
Recommended Articles
This is a guide to HTML Image Padding. Here we discuss the introduction, examples, and how does image padding work in HTML or CSS? You may also have a look at the following articles to learn more –