

Introduction to HTML Address Tag
The <address> tag is used to get contact details regarding the site owner or the article author. It may include address, telephone, email, website connection, and many more. The <address> tag is helpful for different contexts, including business contact information in the page header, or contact information relevant to the author, etc. Traditionally, browsers make as italicized text contained in the <address> tag. This tag is also usually referred to as the element of < address>. Usually, the < address > element will be included in a < footer > element along with other details. In no other way should it be used to identify addresses? In this topic, we are going to learn about HTML Address Tag.
Syntax
The syntax of the <address> tag will be written as shown below:
<html>
<body>
<address>
Contact Information:<br>
www.mycompany.com<br>
#12345, Main Street<br>
Name of City, Name of State
</address>
</body>
</html>
Attributes
Here are the following attributes mention below
1. Global Attributes
Global Attributes will be used to pertain to attributes that are used on any HTML element. Such attributes are prevalent across all HTML elements.
- accesskey: It defines the shortcut key for activating the element.
- class: It gives the class names for an element.
- contenteditable: It is used to indicate whether an element can be edit or not.
- dir: It is used to define the text direction of an element.
- draggable: It defines how the element can be dragged on the page.
- dropzone: It is used to indicate whether data can be copied, moved, or linked when it is connected.
- id: It defines the specific id for the element.
- lang: It defines the language for the element’s content.
- style: It provides the CSS style for the element.
- tabindex: It is used to define tabbing order for the element.
- title: It is used to provide additional information for the element.
- translate: It indicates whether the content of the element can be translated or not.
- spellcheck: It defines the spelling check for the content of an element.
- data: It is used to exchange private data between HTML and DOM depiction.
- hidden: This attribute is used when there is a need to hide the elements
2. Event attributes
An event occurs whenever a browser responds to the intervention of a specific user. When a user clicks on a mouse, uploads a document or a picture, plays a video or performs any other activity on a webpage.
3. Windows Event attributes
Window event attributes are used when window objects are initiated. Popular Course in this categoryHTML Training (12 Courses, 19+ Projects, 4 Quizzes)12 Online Courses | 19 Hands-on Projects | 89+ Hours | Verifiable Certificate of Completion | Lifetime Access | | 4 Quizzes with Solutions
4.5 (6,502 ratings)Course Price
₹6999 ₹41999
View Course
Related CoursesBootstrap Training (2 Courses, 6+ Projects)XML Training (5 Courses, 6+ Projects)CSS Training (9 Courses, 9+ Projects)
- onafterprint: It is used when the document needs to be printed.
- onbeforeprint: It is executed before when the document needs to be printed.
- onbeforeload: It is used when the document will be unloaded.
- onblur: This attribute will be defined when there is no focus from the window.
- onerror: It is defined when there is an error while downloading the document.
- onload: It is specified when webpage content is loaded.
- onmessage: It is used when there is a cause in a message.
- onoffline: This attribute will be used when the browser works during offline mode.
- ononline: This attribute will be used when the browser works during online mode.
- onpagehide: It is specified when the user moves away from the webpage.
- onpageshow: It is specified when the user navigates to the webpage.
- onpopstate: This attribute will be used when there is a change in window history.
- onredo: It is used when there is a redo option on a page.
- onresize: It is specified when the user resizes the window.
- onstorage: It is defined when there is an update in web storage.
- onundo: It is used when there is an undo option that is canceled.
- onunload: It is specified when webpage content is unloaded.
4. Form Event Attributes
An event that can take place within a form is considered an event in the process. The form events occur when a user opens or closes a form, switches between forms, or operates on a form with data.
- onblur: This attribute will be defined when there is no focus on the form element.
- onchange: It is defined when there is a change in the value of an element.
- oncontextmenu: It is used when the user wants to see the context menu.
- onfocus: It is used when an element gets a focus.
- oninput: It is used when an element gets input from the user.
- oninvalid: It is specified when there is an invalid element on a page.
- onreset: This attribute will be used when a user wants to reset the form.
- onsearch: It is defined when the user searches for some information in the search field.
- onselect: It is used when the user selects the text in an element.
- onsubmit: It is used when the user submits the form.
Examples of implementing HTML address Tag
Here are the following examples mention below
Example #1
<!doctype html>
<html>
<head>
<meta charset="UTF-8">
<title>
HTML Address Tag
</title>
</head>
<body>
<article>
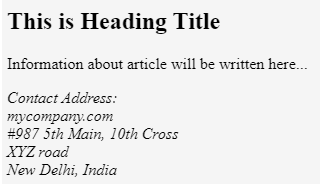
<h2>This is Heading Title</h2>
<p>Information about article will be written here...</p>
</article>
<footer>
<address>
Contact Address:<br>
mycompany.com<br>
#987 5th Main, 10th Cross<br>
XYZ road<br>
New Delhi, India
</address>
</footer>
</body>
</html>
Output:
- Save the above code in a file with a .html extension
- Run the html file in a browser, and you would get the output as shown in the below image
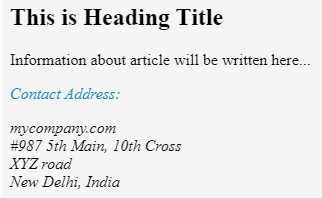
Example #2 – Color property
Code:
<!doctype html>
<html>
<head>
<meta charset="UTF-8">
<title>
HTML Address Tag
</title>
<style>
.color_prop {
color: #1c87c9;
}
</style>
</head>
<body>
<article>
<h2>This is Heading Title</h2>
<p>Information about article will be written here...</p>
</article>
<footer>
<address>
<p class="color_prop">Contact Address:</p>
mycompany.com<br>
#987 5th Main, 10th Cross<br>
XYZ road<br>
New Delhi, India
</address>
</footer>
</body>
</html>
Output:
Run the above file in a browser, and you would get the output as shown in the below image:
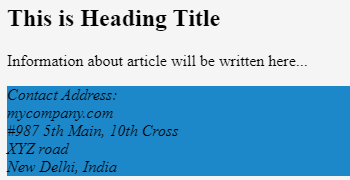
Example #3 – Background Color Property
Code:
<!doctype html>
<html>
<head>
<meta charset="UTF-8">
<title>
HTML Address Tag
</title>
<style>
.color_prop {
background-color: #1c87c9;
}
</style>
</head>
<body>
<article>
<h2>This is Heading Title</h2>
<p>Information about article will be written here...</p>
</article>
<footer>
<address>
<div class="color_prop">Contact Address:<br>
mycompany.com<br>
#987 5th Main, 10th Cross<br>
XYZ road<br>
New Delhi, India
</div>
</address>
</footer>
</body>
</html>
Output:
Run the above file in a browser, and you would get the output as shown in the below image:
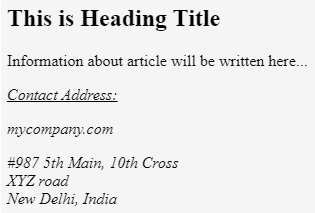
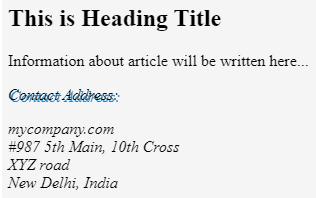
Example #4 – Text Decoration
Code:
<!doctype html>
<html>
<head>
<meta charset="UTF-8">
<title>
HTML Address Tag
</title>
<style>
.style1 {
text-decoration: underline;
}
.style2 {
text-decoration: italic;
}
</style>
</head>
<body>
<article>
<h2>This is Heading Title</h2>
<p>Information about article will be written here...</p>
</article>
<footer>
<address>
<p class="style1">Contact Address:</p>
<p class="style2">mycompany.com</p>
#987 5th Main, 10th Cross<br>
XYZ road<br>
New Delhi, India
</div>
</address>
</footer>
</body>
</html>
Output:
Run the above file in a browser, and you would get the output as shown in the below image:
Example #5 – CSS Fonts
Code:
<!doctype html>
<html>
<head>
<meta charset="UTF-8">
<title>
HTML Address Tag
</title>
<style>
.style1 {
font-family:"Lucida Sans Unicode", "Lucida Grande", sans-serif;
}
.style2 {
font-weight: bolder;
}
</style>
</head>
<body>
<article>
<h2>This is Heading Title</h2>
<p>Information about article will be written here...</p>
</article>
<footer>
<address>
<p class="style1">Contact Address:</p>
<p class="style2">mycompany.com</p>
#987 5th Main, 10th Cross<br>
XYZ road<br>
New Delhi, India
</div>
</address>
</footer>
</body>
</html>
Output:
Run the above file in a browser, and you would get the output as shown in the below image:

Example #6 – Text Shadow
Code:
<!doctype html>
<html>
<head>
<meta charset="UTF-8">
<title>
HTML Address Tag
</title>
<style>
.style1 {
text-shadow: 2px 2px #1c87c9;
}
</style>
</head>
<body>
<article>
<h2>This is Heading Title</h2>
<p>Information about article will be written here...</p>
</article>
<footer>
<address>
<p class="style1">Contact Address:</p>
mycompany.com<br>
#987 5th Main, 10th Cross<br>
XYZ road<br>
New Delhi, India
</div>
</address>
</footer>
</body>
</html>
Output:
Run the above file in a browser, and you would get the output as shown in the below image:
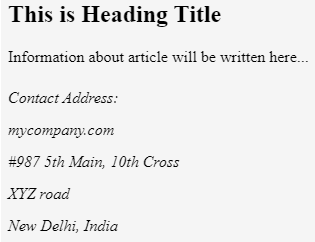
Example #7 – Line Height
Code:
<!doctype html>
<html>
<head>
<meta charset="UTF-8">
<title>
HTML Address Tag
</title>
<style>
.color_prop {
line-height: 2.0;
}
</style>
</head>
<body>
<article>
<h2>This is Heading Title</h2>
<p>Information about article will be written here...</p>
</article>
<footer>
<address>
<div class="color_prop">Contact Address:<br>
mycompany.com<br>
#987 5th Main, 10th Cross<br>
XYZ road<br>
New Delhi, India
</div>
</address>
</footer>
</body>
</html>
Output:
Run the above file in a browser, and you would get the output as shown in the below image:
Conclusion
So far, we have studied how to address tag will be used when an owner wants to specify the address information. In order to quickly contact the author via email, this feature is often combined with the HTML mailto property. The address tag will usually be included in the section < footer> section.
Recommended Articles
This is a guide to HTML Address Tag. Here we discuss the Attributes and Examples to implement the HTML address Tag along with the output. You can also go through our other suggested articles to learn more –