
Introduction to HTML5 Semantic Elements
The following article will provide you with various semantic elements in html5. Let us begin with an understanding of Semantics. Semantics is all about different types of tags, which functionality would depict and perform the same function as per its tag name. The functionality of the tag would be easily understood by its name, which is in a user understandable name/format. Most of the elements in HTML are generally semantic elements.
Advantages of Semantic Elements in HTML5
advantages of semantic Elements are as follows:
- Easy code understanding.
- Maintenance can be done fast and appropriately.
- There is no need to add any description specifically for any tag.
Various Semantic Elements in HTML5
Let us now get into the semantic elements :
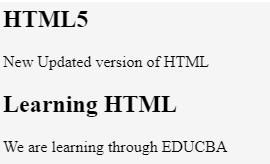
1. <article>
This tag gives us some idea that the data inside this tag is specifically for similar content. It depends on the different types of articles we generally have too. It can be a blog, forums, column articles in newspapers, etc.
Code:
<html>
<body>
<article>
<h2>HTML5</h2>
<p>New Updated version of HTML</p>
</article>
<article>
<h2>Learning HTML</h2>
<p> We are learning through EDUCBA</p>
</article>
</body>
</html>
Output:
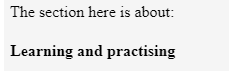
2. <section>
This tag is about providing a sectional content of the total data. In knowing about using both article and section tags, those tags can be used inside each tag. That is section tag can be used inside the article tag and vice versa.
Code:
<html>
<body>
<section>The section here is about:
<p><h4> Learning and practising</h4> </p>
</section>
</body>
</html>
Output:
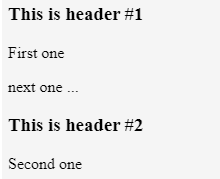
3. <header>
This tag gives all the header data. Any data which we want to place in the header format is used under this header tag. And this tag can be used a number of times in the whole HTML scripting. Let us see a small example of it.
Code:
<html> Popular Course in this categoryHTML Training (12 Courses, 19+ Projects, 4 Quizzes)12 Online Courses | 19 Hands-on Projects | 89+ Hours | Verifiable Certificate of Completion | Lifetime Access | | 4 Quizzes with Solutions
<body>
<header>
<h3>This is header #1</h3>
<p> First one</p>
</header>
<p> next one ...</p>
<header>
<h3>This is header #2</h3>
<p> Second one </p>
</header>
</body>
</html>
4.5 (6,492 ratings)Course Price
₹6999 ₹41999
View Course
Related CoursesBootstrap Training (2 Courses, 6+ Projects)XML Training (5 Courses, 6+ Projects)CSS Training (9 Courses, 9+ Projects)
Output:
4. <footer>
This is the footer section in our HTML script. Generally, we see all the copyright data and the small section we find under any offers like “conditions apply” on any offers. So these things are defined under the footer tag.
Code:
<html>
<body>
<p> Inside Body and above footer tag</p>
<footer>
<p> Inside footer tag.</p>
</footer>
<footer>
<p><h4> Another footer tag</h4></p>
<p><h6>Conditions Apply</h6> </p>
</footer>
</body>
</html>
Output:
5. <nav>
This tag gives us the navigation elements. The URL in any HTML document scripting where we generally want to navigate from one page to another page through this tag. Any data which is given under this tag is available as hyperlinks. These hyperlinks can be useful in navigating from one section to another section. A small example is defined as:
Code:
<html>
<body>
<h4> About </h4>
<nav><a href="#"> About link 1</a>
<a href="#"> About link 1</a>
</nav>
<h4> Contact </h4>
<nav>
<a href="#"> Contact Link 1</a>
<a href="#"> Contact Link 2</a>
</nav>
</body>
</html>
Output:
While practicing, click on those links and check how the color of the hyperlink changes on clicking.
6. <aside>
This is a tag that is used to display the data on the sides of our HTML document. On many websites, we can find content that exists in a sidebar, which is displayed using this aside tag. This content should be in line with the other data present in the document. Let us see a small example of it.
Code:
<html>
<body>
<p>How aside tag is used </p>
<aside>
<h4>Inside aside tag</h4>
<p>Content inside aside tag</p>
</aside>
</body>
</html>
Output:
The exact content cannot be specified completely in the same way; it can only be documented and understood clearly while using the whole HTML page.
7. <figure>
This tag specifies that we are going to attach an image. This tag can be used to specify an image source and display a gif or image.
Code:
<html>
<body>
<figure>
<img src="">
</figure>
</body>
</html>
As mentioned above, that is how we can define the figure tag. Inside the figure tag, we can specify our image command with a source tag. Inside this figure tag, we can, in turn, use the figure caption tag.
8. <figcaption>
This tag is used to give a caption under the image that is provided. It can be used inside the figure tag. Usage of that can be seen in the below example.
<html>
<body>
<figure>
<img src="">
<figcaption>This is description of the image attached.</figcaption>
</figure>
</body>
</html>
You can try executing the same by giving an image source and check how the output is being displayed.
9. <main>
This tag specifies all the attributes and the complete content of the HTML site. It contains all the unique content. An important thing to notice for this particular tag is that this tag can be used only once in the total page creation. We find that other tags can be used more than once in creating a web page, but this main tag is a single time usage tag.
Code:
<html>
<body>
<main>
<h1>Learning HTML Semantic Tags</h1>
<article>
<h4>Studying</h4>
<p> Reading would help to understand different topics</p>
</article>
<article>
<h4>Practising</h4>
<p> With Studying , Practising is a must thing to do in learning</p>
</article>
</main>
</body>
</html>
Output:
10. <mark>
This tag is for highlighting specific content or data. In other words, this tag is helpful in marking data. Let us see a small example for this below:
Code:
<html>
<body>
<p> In this whole text which I am writing now, <mark> I want to mark this text </mark></p>
</body>
</html>
Output:

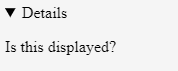
11. <details>
This tag contains the additional details that users can hide any details on their wish. Through this tag, users can open/close any content which they need. If we want that tag to disclose its details at the start itself, then the attribute “open” can be used.
Below is a small example of the same:
Code:
<html>
<body>
<details open="true">
<p>Is this displayed?</p>
</details>
</body>
</html>
Output:
Now, what would be the output if we did not use the open attribute?
<html>
<body>
<details>
<p>Is this displayed?</p>
</details>
</body>
</html>
Output 1:
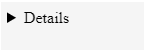
Output 2:
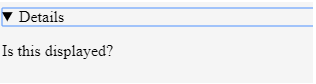
12. <summary>
This tag is used inside the details tag. Under the details tag, we can have a summary tag that specifies the entire summary of the web page or the HTML document. An important thing to note here is that the summary tag is the first child tag that has to come under the details tag. Let us find a small example below:
Code:
<html>
<body>
<details>
<summary> Have written this inside summary tag which is inside details tag</summary>
<p>This text only comes under details tag</p>
</details>
<p> This text data is written after completion of details tag</p>
</body>
</html>
Output 1:

We had highlighted the arrow in the above output, as we get our output 2 once we expand it.
Output 2:

This tag might not be giving out any difference
13. <time>
This tag defines date/time in such a format that users can easily understand. But a thing to note is that this tag may not give us a changed output in many of the browsers.
Code:
<html>
<body>
<p>At present time is <time>11:00</time> pm in the night.</p>
</body>
</html>
Output:

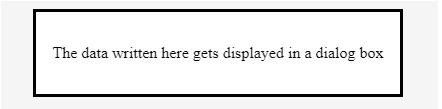
14. <dialog>
As the name already suggests, this tag is for writing any content in a box. This tag should have an open attribute for displaying the dialog box once the source code is executed. Find an example below:
<html>
<body>
<dialog open=true>
<p> The data written here gets displayed in a dialog box </p>
</dialog>
</body>
</html>
Output:
15. <progress>
This tag gives the progress of a certain task in a graphical representation. We here need to have the maximum number for which the progress has to be represented. This tag mainly consists of two attributes. Max and value are the two attributes. Max represents the total count that has to be completed, and Value gives us the count percent that is finished with respect to the maximum count value. An example for that is below:
Code:
<html>
<body>
<h1 style="color:red;">EDUCBA</h1>
Your learning progress is:
<progress value="72" max="100">
</progress>
</body>
</html>
Output:

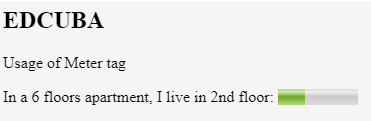
16. <meter>
This tag is for measurement. This can be utilized for the space taken by a query or usage of disk space also. There are a few attributes that are to be used with this tag. The attributes are max, min, and value. Based on their usage, we can definitely figure out their purpose and usage.
Code:
<html>
<body>
<h2>EDCUBA</h2>
<p>Usage of Meter tag</p>
In a 6 floors apartment, I live in 2nd floor:
<meter value="2" min="0" max="6">2 out of 6</meter>
</body>
</html>
Output:
17. <video>
This is a tag that has been introduced to add video files to our HTML page. Until this tag was introduced, developers used plugins to introduce video files into HTL page content. There are a few attributes that can be used along with the tag. Autoplay, Preload, Muted are some of these.
Code:
<html>
<body>
<video>
<source src="video_name.mp4" type="video/mp4">
</video>
</body>
</html>
We just need a source tag to give the source from where we need to upload the video content to our page.
18. <audio>
This tag is for adding audio files to our Html page. The usage and the source tag would be the same as that of the video tag. As an exercise, try using all the semantic elements and create e HTML 5 version web page to learn better and faster.
Conclusion
In this article, we have got to see many semantic elements and their usage in HTML5. One important thing to note here is, many of these tags are supported by internet explorer versions greater than 9 and chrome versions greater than 3. So, keep learning and practicing better to understand the usage of tags in HTML 5.
Recommended Articles
This is a guide to the HTML5 Semantic Elements. Here we discuss the introduction and various semantic elements in HTML5 along with its code implementation. You may also look at the following article to learn more –